Wednesday, June 12, 2013

Playroom Transformation #3: Flannelboard - Corkboard Makeover


Here's another playroom tutorial for you! For this one I just had an old cork board lying around that I wanted to re-purpose into a flannel board. So, here's a few pictures along the way:


I painted the trim with just some acrylic paint. I was not looking for perfection and I wanted it to have an aged look, since I knew it wasn't going to be perfect. So, after I painted it I actually sanded it a bit to give it that worn look.


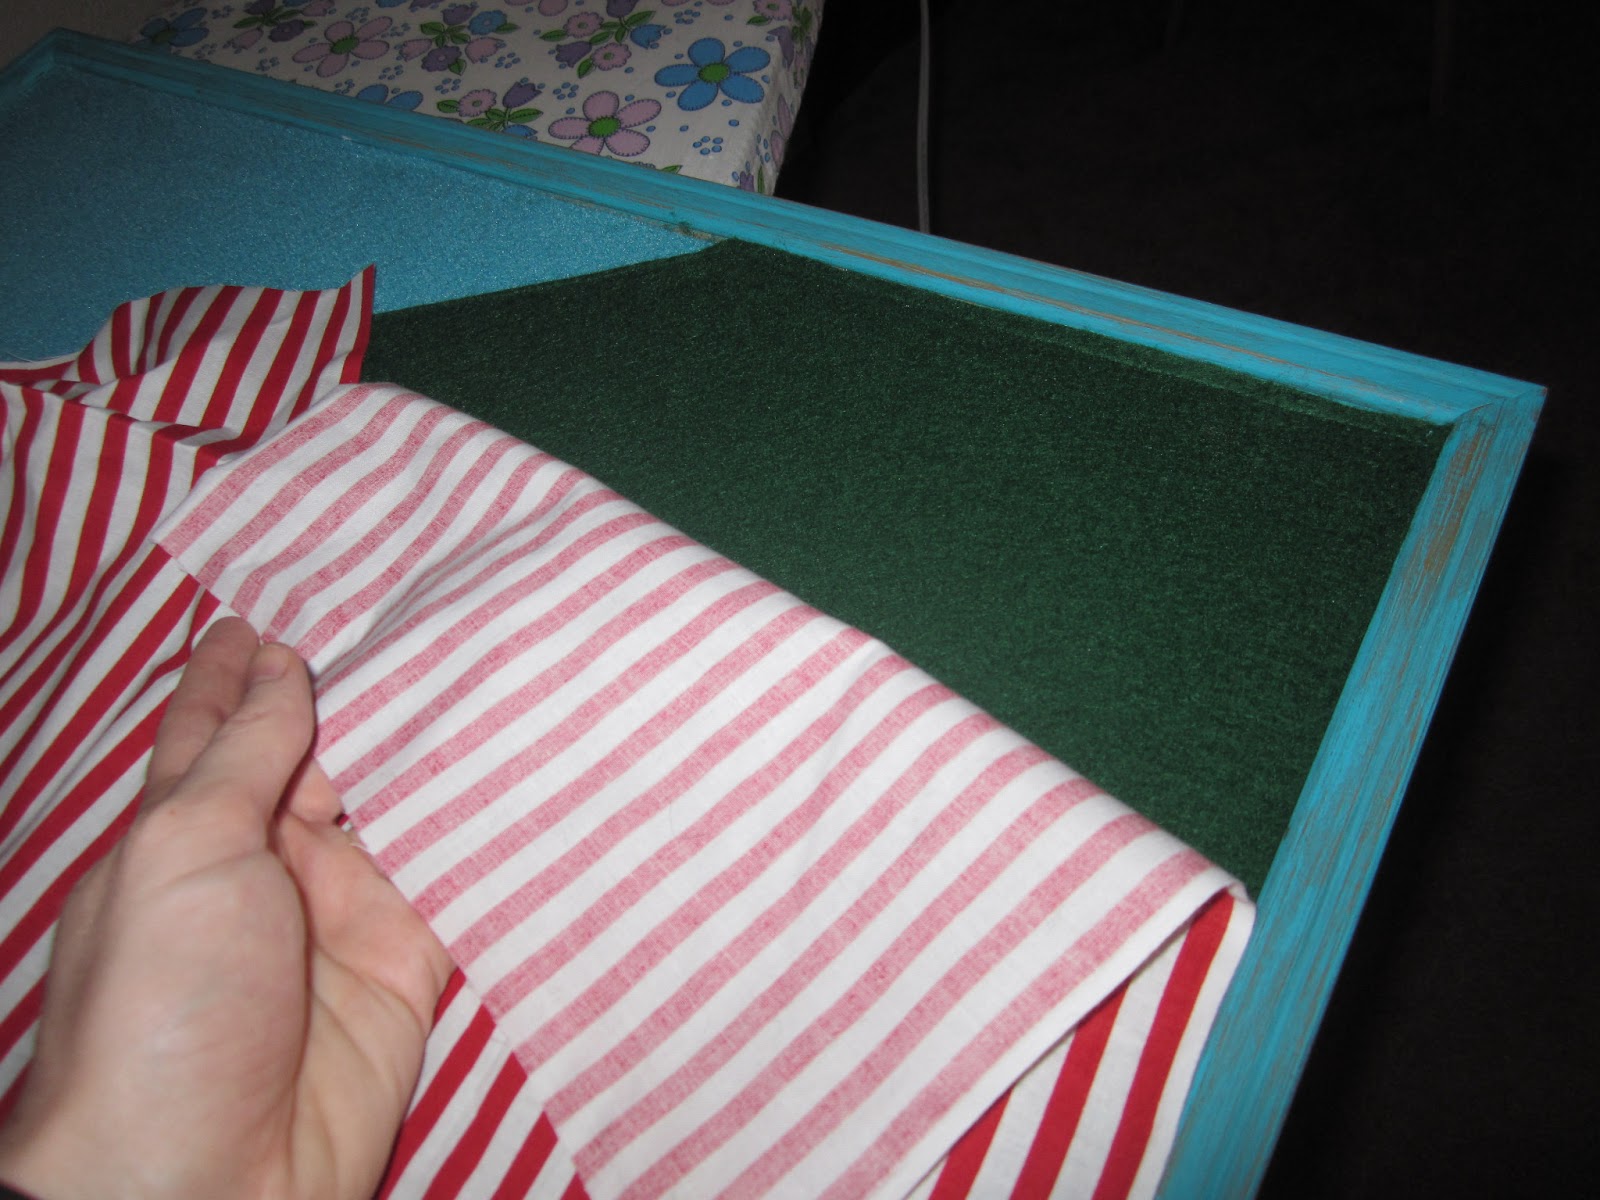
Next, I took my roll of heat and bond and ironed it around the edges and a strip in the middle.


Then, I worked on the actual felt board. I wanted to have a permanent division between land and sky so I made my accordingly but you could skip this step and just keep it a solid color if you wish. I cut my felt to the right size (took a bit more time then expected). I then pinned on my grass hill .


I sewed it together.


Then all you have to do it start ironing it on once you have it lined up.


Some pointers when ironing it on:
-Use a thin cloth over it so you don't accidently burn the felt.
-Don't rush. It takes a little bit of time making sure every portion of the heat strip actually adhered to the felt.
-Make sure the felt doesn't move while your doing it. But on the plus side, felt can stretch, so if you end up having a gap just try to stretch the felt as you iron.


And there you have it: A fun corkboard re-purposed into a flannel board. Now, bust out that fairy tale felt pieces and let the kids play!


Happy crafting and God Bless!

Heather Joy

Wednesday, June 5, 2013

Family Handbook


My husband and I had the awesome opportunity to go to Alaska this past September. Ryan had a work conference there, so we decided to make a trip of it since his flight would be taken care of. Since, we lived so far from family we had to call on the grandma's to brainstorm what we could do for our girls to get watched. If you have kids but don't live near family, you know what I mean. It's one thing to leave them with your friends for maybe a day and a weekend if you stretch it but for a whole 10 days? Nope, it just wouldn't happen. Plus, the limited friends we would even consider all have quite a few children themselves. And we didn't want Kara and Emma to be a burden on anyone.

So, my mother volunteered to help watch the girls for part of the time and Ryan's mom and youngest sister offered to come out for the rest. Hallelujah! What a blessing they are to us! At their own expense they chose to come and spend time with their grandchildren so we could have our first time away since our first child was born- 3 years!!

Anyways, so in preparing to leave my children with grandparents who know nothing of our schedule, where things are in our house, the girls' likes and dislikes and not to mention doctors or emergency info...I decided to create The Garcia Family Handbook.

You can see it starts with a simple silhouette picture with all of our family members listed. (Emma is a baby now but I'd rather prepare for the future, so I chose an image that our family can grow into).


The first and most important thing to include was our emergency info. I listed our doctor and her phone number. I listed nearby urgent cares and hospitals that are covered on our insurance. The number of the sheriff and pretty much any other number I could think of, including my two go to people that I could call on for anything. I also made copies of our insurance card and my drivers license, just in case.

Mostly because of this page I have always gotten this handbook out whenever we have sitters watching our girls too!


The next pages list our regular schedule. Both our weekly and daily schedule.


Next, is our nap schedule and rules for putting Kara down since she can sometimes test the boundaries.


This is followed by our night time order and enforcement.


Next is the outings page with a list of ideas of places they could go. I included places, like close parks, jumpy places, our friends' farm, library story time, pet shops (we always look and then buy a handful of cheap treats for our dog) and other places as well.


Here's just some more info and calendars from our regularly visited places or places that we have memberships to: children's museum, gym, etc. That way they could plan to go to storytimes, events and whatever was happening that week.


Here are the pages I put some food suggestions. What the baby can/cannot eat at this point. I also put some likes and dislikes with some meal suggestions. This helped them to know what the girls were used to.


Next were some pages on 'Where is That?' and 'Plants'. I included these pages to make sure all my plants didn't die while we were gone, ha! And because some things I just didn't think they would remember where stuff was. I listed things like cooking supplies (because my mother in law is an amazing cook and knew she'd be baking up a storm) and medicines, band-aids, clothes, diaper storage, extra toilet paper, etc.  I'm sure there were a lot more things I could have listed but I only got a couple calls while we were gone asking me where things were, so I think this worked out pretty well.


The last and final spread of the handbook was about our pet care. We have a dot and cat and we just wanted to make sure they got fed at the same time and put away and out at the same time as normal. 


If you are planning a trip and leaving your kids with a babysitter or family member I highly suggest investing the time to make one of these books!  The grandma's said they brought it with them wherever they went (mostly because of the emergency info) but they looked at the nap schedule and everything whenever they needed to.

God Bless!

Heather Joy

Wednesday, May 29, 2013

Quiet Book #19: Piggy Bank

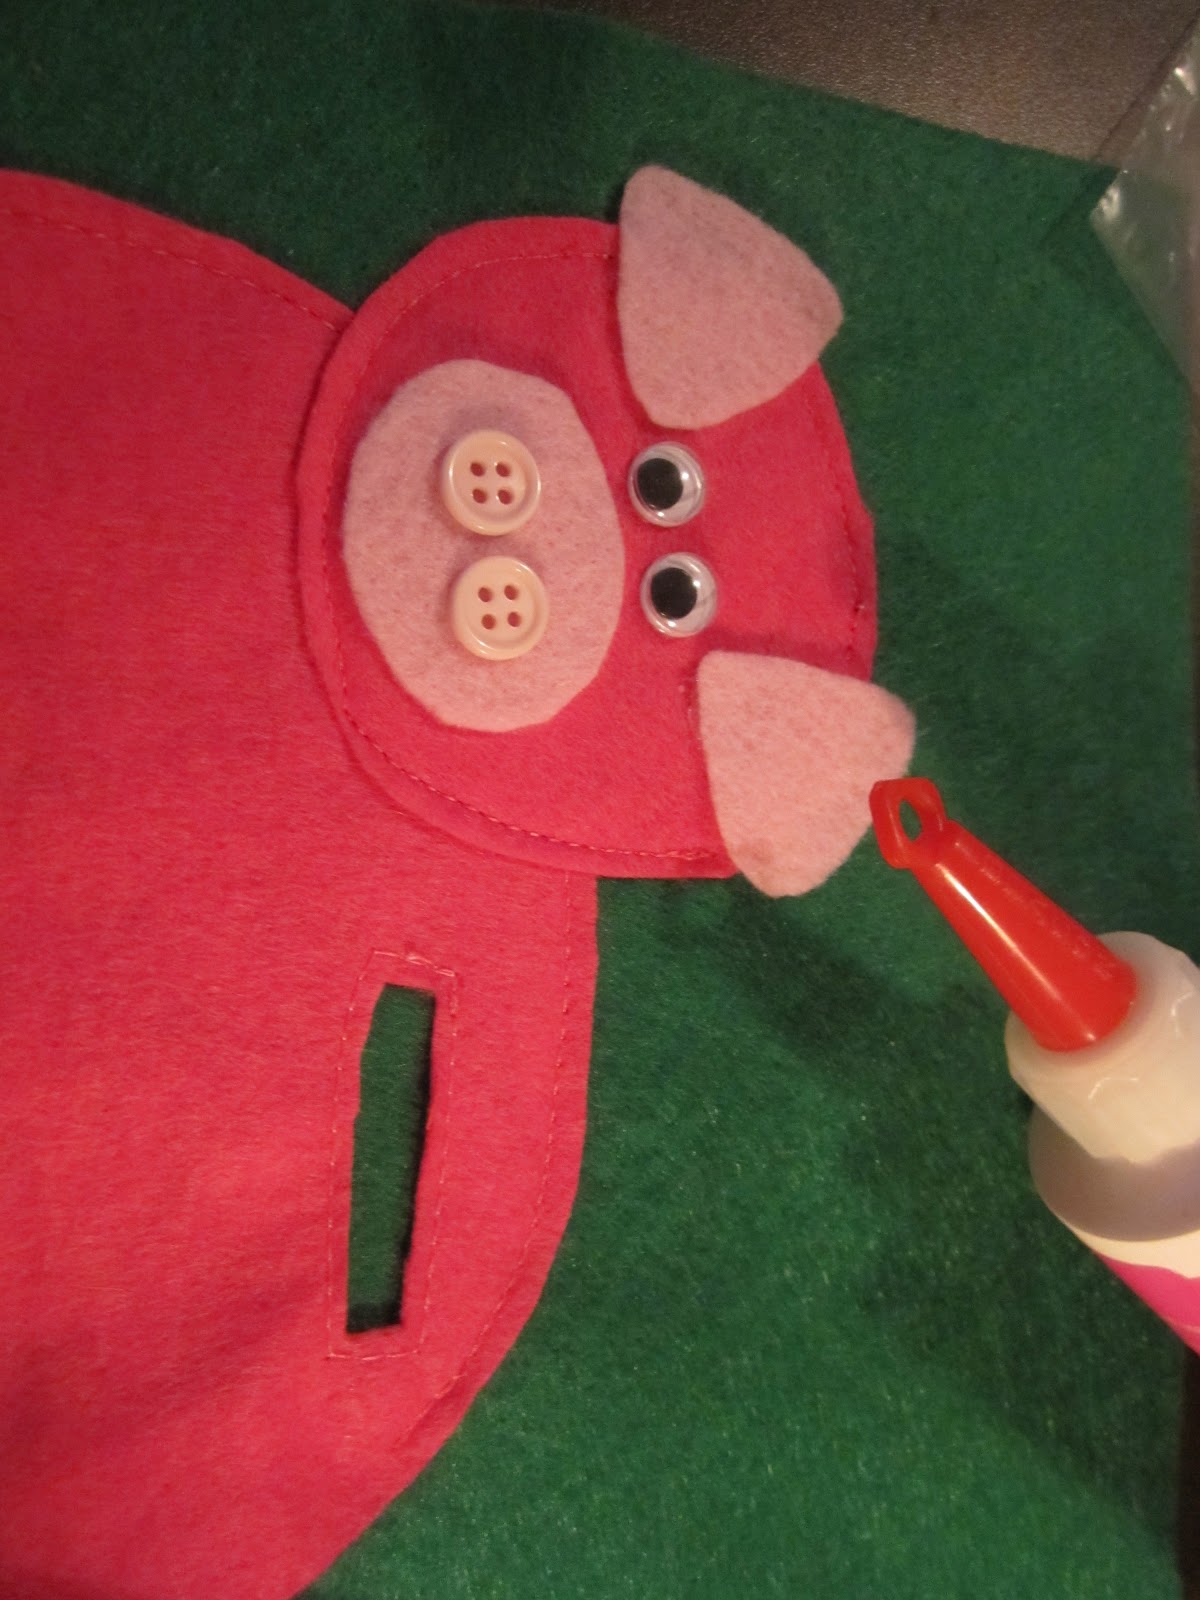
Here's the Piggy Bank page.  I had a lot of fun making this one and I love that she can place the coins in and get them out.  Here's the final product, despite his cross eyed eyes:


I just looked at a few bank pages online and then just started creating my shapes on my own.  Overall I think it turned out good.  The pieces you will need are: head, two ears, two eyes, nose, 2 buttons, body, four legs, two of which are short, and four hooves. 


First, I glued on the top legs.


Next, I stitched around the opening to prevent it from stretching as the kids play with it.


Glue boxes of velcro on the back side where you want it to open.


Place the other side of the velcro on, so it will line up perfectly.


Pin down the pig and pin up the part with velcro so you can place glue on it later.

But first, you will notice that you have to sew on the back foot first, before glueing down the velcro.

So, sew the tiny foot on. And then you can glue and put down the velcro back side.

After it's dry you can sew around the rest of the pig.

The only part I didn't sew over were the ears of the pig. I glued those on too.

Then honestly out of laziness I glued down the hooves instead of switching my thread color.


Here is the final page again for you to see.  Don't forget to add a curly tail.  I just placed it under the flap that opens to get the coins out.  I was trying to find the curly shoelaces but they cost a fortune, so I opted for a felt curly tail.


Hope you enjoy!  My girls love the playing with the plastic coins with their pig.

Happy Crafting and God Bless!

Heather Joy

Wednesday, May 22, 2013

Pregnancy Announcement


Nothing fancy in this post but I just wanted to share how we announced to our family we were expecting number two. We usually send a group of photos to the grandparents on occasion to their Costco for them to pick up. If you haven't ever thought of doing that you should consider it. It's a way for the grandparents to have up-to-date pictures in their frames. I just choose pictures, upload on the Costco website and when ordering I choose the pick up from warehouse option. Then I pick their warehouse. I tell the grandparents I sent some pictures. They pick them up, in my name, and pay for them there, which also makes it free for me! But the grandparents never complain and they actually ask me occasionally to send some more if I haven't done it in a while.

We had been searching for a sit and stand stroller on Craig's List for some time, knowing we were growing into a larger family. We finally found one and took the above picture. We simply included it in our regular upload to the grandparents and waited. It was really funny. They didn't know quite what to say when they called. But they all said it was a fun way to find out. I guess I need to start brainstorming for any other additions we may have in our future. :)

God Bless!

Heather Joy

Monday, May 20, 2013

Church Website Design

Well, if you were unaware of my roles, besides being a mother, daughter, wife, church volunteer, teacher, graphic designer, and maid (at least it feels like it), I am also a web designer.  I actually use to work for my brother's website design company he owned.  Since the company closed I still have done a few websites for friends.

It's nice to be able to do them when I want to.  Plus, it's a little extra money. That's always good :)  Since moving out to Texas and getting involved at our church I couldn't stand by and watch their pitiful website any longer.  Really.....it was pretty bad!!  Anyways, what better than to use the gift God has given you to better his kingdom, right?  So, here's a few photo clips of the new church website I designed.  I say new, but really it's been up for about 3 years now. Ha! Man, time flies!


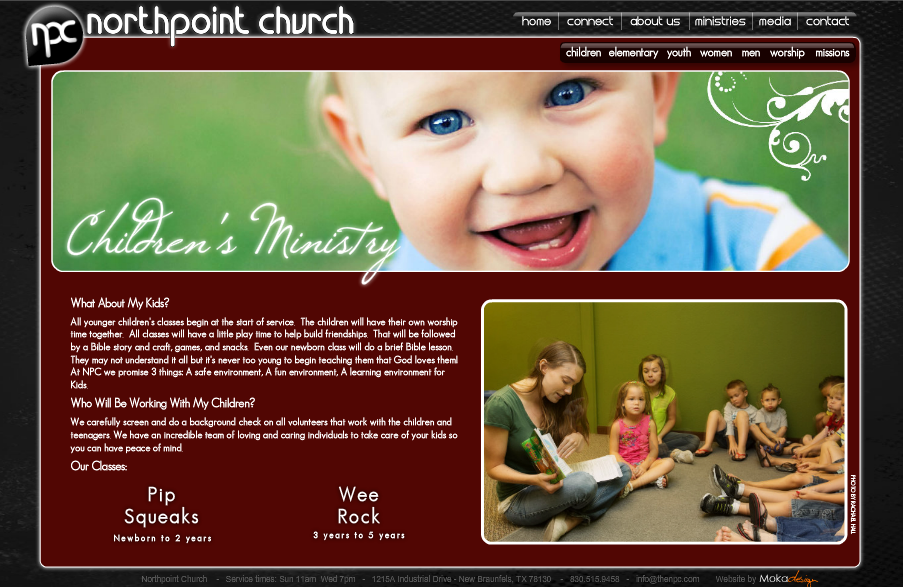
The homepage (top picture) has a gallery that filters through the current series as well as upcoming events. And the buttons on the bottom link to additional pages.  Here's the link if you want to see more.

It was a lot of work to gather all the information and get pictures of the rooms and pages for all the galleries, but I think it turned out nicely.  I wish I took a before picture.  Plus, there's a ton of more information on here than the previous website.  I think they only had three pages and my current design has....well, A LOT!

Church websites can become really complicated with having so much information and keeping it from becoming a maze of links.  I wanted this to be really user friendly and just look more classy and trendy to fit our churches style.

My favorite thing is meeting new people that come to the church and I ask them how they found us and almost guaranteed- it's because of the website!  They liked the look and feel of the website and that's what brought them.  A lot of people were surprised by the size of our church because the website looks so professional (I always insert a pat on my own back here). Mission accomplished.  That's exactly what I wanted it to be - a professional looking website.

After I found out they found us from the website I always ask them what they think about it.  I usually don't acknowledge any involvement until I get honest feedback because that's what keeps my eyes fresh on the website.

Anyways, maybe I'm rambling on for a mostly crafty website but just know that website design is a part of my serving the Lord too and I'm proud to do it!

Hope you enjoyed the design.

Blessing to you!

Heather Joy

Wednesday, May 15, 2013

Quiet Book #18: Going to Church

This is the Going To Church Page.  It has a car that represents ours and you drive it down the street to the church.  It's really fun and simple.  The girls seem to really like this page.


To start here are all the pieces you'll need: tree top, tree trunk, house, roof, door for house, two pieces of the street, church, two church windows, two doors to church, a bunch of yellow strips for the lines on the road.


Here were my plans when I first started, it kind of shifted and turned into a church page.  It was originally just a car driving page, but why not incorporate some church into it I say?!


Here's everything pinned down and ready to sew.


Before you start sewing I made sure to glue down the stripes for the road.


Here's the final picture again.  The doors on the church open and the top of the roof of the house opens to reveal the gold car that comes out and can drive down the road to the church.  The girls especially love pretending their friends are coming in and out of the doors. 


Sorry for the sideways pictures! I couldn't find my files to even fix it. Anyhoo...

Happy crafting and God Bless!

Heather Joy


Friday, May 10, 2013

It's Sweeping Time!


I recall a time when I was working at a school and was in the kitchen getting an ice bag for an injured student when a teenage helper walked in to get something as well. We chatted a little bit while I got out a baggie and then the ice from the freezer. Continuing our chat she watched as I twisted the ice cube trays to get out some ice. "What?! Is that how you're suppose to do it?" she said. "What do you mean?", I asked. She responds, "I've always wondered how people get ice out so easily. I've always used a knife and picked out each ice cube." I laughed to myself. Had she really never known to twist the cube trays to loosen the ice first? Looking back on this moment many a time (I know it's weird I remember this ice cube story often) but...I'm reminded how even the simplest things can't be expected unless they are taught to you. Unless someone had shown this girl when she was little how to twist the tray to get out the cubes how could she be expected to know to do that? She couldn't.

I am always striving to provide new opportunities to teach my girls and show them how to do things. I mean, that's what parenting is, right? Well, this week I got a mini broom at the store that was just too cute to resist. So this weeks task to learn: how to sweep.

Kara is such a sweet girl and always wants to be mama's little helper. One of the frustration points with me is cleaning up after these girls eat. I don't understand how two girls can seriously miss their mouths so much. Maybe it's a secret contest of who can get the biggest spread of debris from one meal but I can never keep up with it. So, Kara is going to be trained to start sweeping underneath her own table. The first task is learning how to sweep at all. Then I'll tackle using a dust pan and then sweeping actually under the table for her food remnants.

I started with a square of masking tape on my floor. I made sure it was fairly large at first and can make it smaller as her skills improve. Then entered a big bag of Pom poms. I threw them across one side of the floor. Her task was to sweep all of the Pom poms into the square.


Sister had to get in on the action too.


Now while her approach might not be perfect, we're tackling one thing at a time. We'll start working on form after she gets a little success under her belt. Hope you'll take the time to train your children in the way they should go...and not just expecting them to magically arrive there.