This tree decal was the biggest planned change in our playroom transformation. It took a lot of time and planning and ironing, but I love love love how it turned out!! (Although, I can't wait for my pink bird to be included on our tree!)
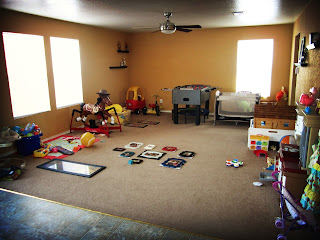
As you can see, our playroom is in a huge transition right now! Everything is getting moved or trashed or stored away. Man, this is a lot of work, but this tree was the biggest project I had planned, at least I think so and it totally changed the room. Just wait you'll see.
I'm going to attempt to show you pictures from along the way. I started by just looking at trees online and sketching out how I want the branches and leaves to look. Next, I picked out the fabric I wanted and a big roll of heat and bond and a roll of freezer paper.
Then I used the freezer paper to cut out a template for the tree, just so I could move stuff around with sticky tac on the wall until I found the size and shape I liked. Here you can see what it looks like as it was going up:
(You can see my daughter's tree on the left that she was sticking to the wall, ha!)
Don't forget to add a cute little birdie in your tree!
Then you need to iron on all the heat and bond onto the back side of the fabric for green leaves and the brown for the trunk. Just guess how much you'll need. You can always iron more on later if needed.
Peel off the back side of the heat and bond and now your fabric is all ready to go!
After you've got that ready it's time to start replacing the template with the real fabric. I tried numbering each branch, so I wouldn't get them confused but I ended up just taking off one at a time and doing it that way. So, you start by marking where the branch goes on the wall (where it connects onto the trunk or branch and at the top, so I know what angle it needs to be at) because you will have to take off the leaves that are above it.
Next, using your freezer paper templates, lay them on the fabric UPSIDE DOWN!!! onto the glossy side of you fabric, pin them down and cut out your shapes. (I only had one mess up and then I remembered.)
After that you just need to iron it on the wall. I started at the top and worked my way down because I wanted to make sure it connected to the tree. You can see in the picture below I made sure to provide a little excess to go under the branch that will go on top. No floating branches wanted here!
One branch up....a ton to go.
Here's some more pictures along the way:

(above: I combined some of the smaller branches into one piece, instead of dealing with each one individually. You can see here the two smaller branches were not attached before when I was just trying to get my template up there, but now I will cut one branch including these two smaller branches.)
(The massive trunk was the most challenging piece to do.)
Next, I cut a bunch of different colored leaves. I made two sizes of leaves only, but I made a variety of the sizes in different colors. I chose 3 different colors. You could choose them to all be the same or add more variety. Whatever you want!
Then just start ironing them on the end of branches and on mid-branch on some. I made sure to change which leaf was on top and what sizes were next to each other and kept a variety of the colors all around the tree. Here's the tree getting filled in completely:
I love how this turned out! Although I still need to add the bird. I wanted a colorful color but wasn't sure yet what I wanted, so it will come in a bit. I'll have to add a photo of that later, but in the meantime I hope you enjoy this tutorial and realize that if I could do this you can do this! It only took 2 1/2 nap times to get this done! And the girls love it. Plus, I made an interactive birdhouse in a future tutorial, so the tree will serve a purpose as well as just being plain cute! :)
Well, here's an after shot of the playroom and compared to before I am quite content, although we have a long ways to go before it's the way I imagine it to be.
Happy crafting and God Bless!
Heather Joy


